Monday, December 13, 2010

My Christmas Home Tour

I'm late to the Nester's Christmas Home Tour, but better late than never, right? Here's what you can find around my home right now:vintage santa ornaments in a bed of vintage shredded music,

new Christmas pillows,
a bucket of saved christmas cards with this years family card in the front, 
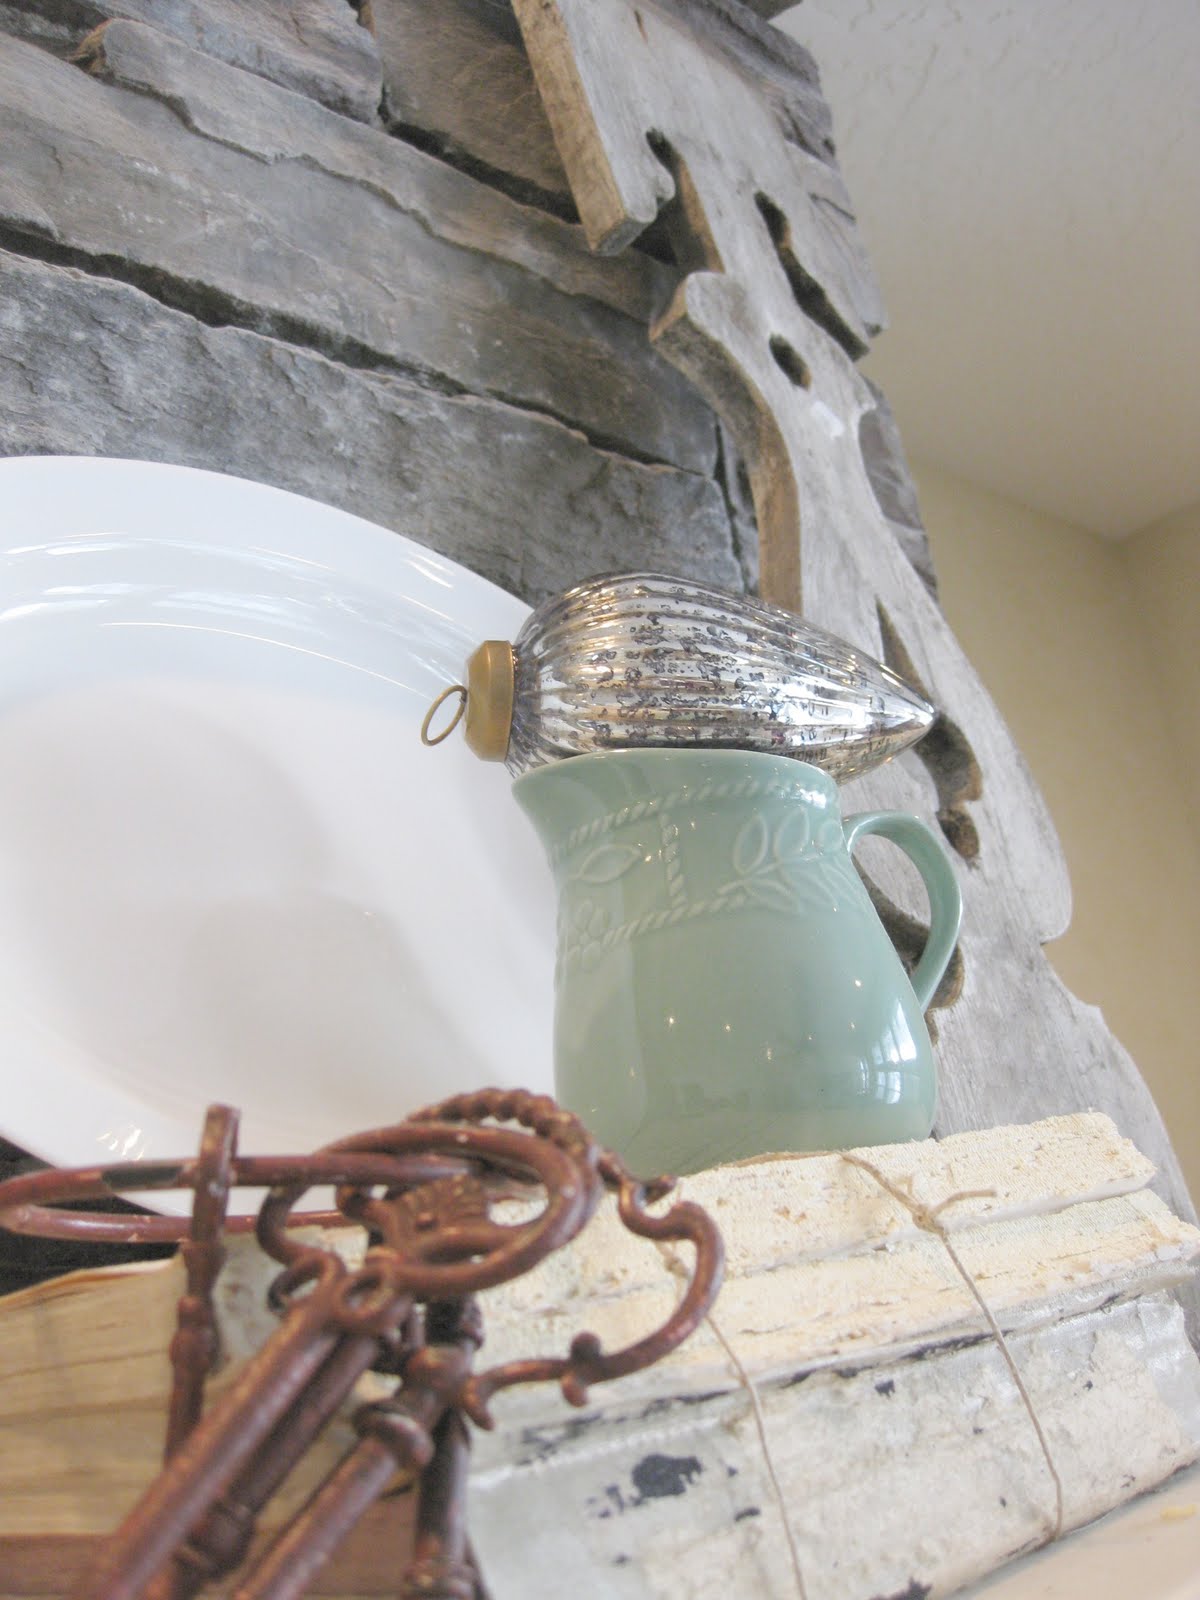
lots and lots of mercury glass ornaments,

a peek at my finished tree with many ornaments made just this year,


lots of blue and white and silver,


counting down until the big day!
I hope you enjoyed the quick tour. I'm linking up to this fabulous party!

Friday, December 3, 2010

a little sewing & a plea for help

After seeing this picture in the December Country Living magazine I knew I wanted to create a similar design with my own twist. I took some dropcloth material I had leftover from making some curtains for my bedroom.


I love the nubby yet soft texture of this material. I used some Making Memories letter stamps from my scrapbooking stash to stamp the letters.


I stamped Peace on one side,


and joyeux noel on the other.


Then I washed in hot and dried in the dryer to allow the black paint to fade a little and give it more of that worn look.


I also made one that says Feliz Natal on one side for my hubby who lived in Brazil for a couple of years.


Help! Ever since I saw all the pictures from the Ruffles & Rust Ball a few months ago I've had this wish banner in my head, and on my mental 'to buy' list. However, I haven't been able to find it anywhere.

When I found this cute wish sign I was temporarily satisfied but if anyone knows where I can find the large one I would love to know!

Grain Sack Ornament

This little tag was inspired by an ornament I found in the clearance section of a Christmas decor store.


There was only 1 left, however, so instead of buying it I thought I would try & recreate some for myself to hang on my tree. I took some muslin and created a faux grain sack design using masking tape and red paint. I used my Making Memories "peace" stamp and added some red rope like ribbon found at the thrift store.


I ripped the edges of the fabric to give it some character and glued it to the front of a tag I had in my scrapbook stash. This was a very quick project, and helped me to add a little red to my mostly white & silver tree.

Thursday, December 2, 2010

Vintage Bottle Brush Tree Ornament

I was so excited when I found these cream bottle brush trees in the clearance section of a local Christmas decor store. I got even more excited when I got up to the cash register to tell the guy there was no tag on them, and he said, "how 'bout a dollar each?" Woo hoo, I just love them.
I decided to dress them up a little bit before adding them to my tree. I made a little sack out of muslin I had in my stash by just sewing 2 sides of a wide strip of material, leaving the top unfinished.

I pulled out my letter stamps to add 'noel' to the front.


I tucked the tree inside the sack and tied with some string.


I think I'm on a roll. More handmade ornaments to come!

Bookpage Ornament

This book page ornament was inspired from this post.
I tweaked her instructions after making one for myself. I found it was easier to cut 4 full ornament designs (not just the half she shows), and then glue those 4 together. It gives it a little different look, not as full, but I think easier to create with less of a headache.


I added some silver glitter to the edges to give it some sparkle.


This cute little charm is from the $1 bins at Michaels! I just took the ribbon off of it and used it on the top of the ornament, then hung the charm on the bottom.


I'm lovin' all the handmade ornaments I have gotten done recently. My tree is really starting to fill out now. I just finished 2 more ornaments that I'll show you next week!

Advent Tree

Here is our advent tree. I think I got this idea from Martha Stewart years ago--but could not find it anywhere on the internet!

Just wrap tiny matchboxes with paper and add a tag with ribbon. Then attach the box to the tree using a small piece of wire.


In years past I would put a small piece of candy inside for the kids to enjoy each day, but as we added to the family I found it was hard to fit 4 pieces of anything inside these tiny boxes. Last year I decided to add strips of paper to each bag with a fun activity to do each day.


Here is our list this year:


1. Play a game in front of the fire.

2. Address & send out Christmas cards

3. Make some Christmas candy.

4. Shovel someone's walkway.

5. Read in Luke 2, then act out the Nativity scene.

6. Make gingerbread houses.

7. Donate food for the food drive.

8. Read a Christmas story.

9. Make some reindeer food.

10. Take a drive to see the Christmas lights.

11. Build a snowman.

12. Make a treat for someone in the neighborhood.

13. Donate to Toys for Tots.

14. Listen to Christmas music.

15. Sing a Christmas song.

16. Make gifts to give to the kids' teachers.

17. Be a secret Santa for a single person in the neighborhood.

18. Go sledding.

19. Have a snowball fight.

20. Read a Christmas book.

21. Put a puzzle together.

22. Watch 'Christmas Vacation'

23. Make cookies for Santa.

24. Read 'Twas the Night before Christmas' and set out cookies and reindeer food.

This year I decided to add in a few service oriented activities along with the fun ones. I think it is really great to let kids have the chance to do nice things for other people, but sometimes it's hard to find things for little kids to do. What simple things do you do with your kids?


Christmas Vignette Party

Here are some Christmas vignettes that can be seen around my house. white & blue with a touch of silver


(peace sign & blue & silver acorns recently found at Walmart for $1!)


(that's me!)


merry & bright--full of color (blue & red)


whites & creams with a touch of green (a green bucket filled with mercury glass ornaments) can be found on my mantel


I'm linking up to this fabulous party!